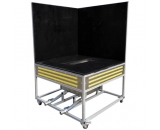
DSH 391.mod. A Ball pressure test
http://decisions.iecee.org/icons/ecblank.gif DSH 391.mod. A
Ball pressure test
5 – 7.1, Fig. 1 – Fig. 2
60695-10-2(ed.1)
Standard(s): IEC 60695-10-2/2003 No. Year
Corrigendum 1 (February 2006)
DSH
391.mod. A
2009
Category: VARIOUS
Subclause(s): 5 – 7.1
Fig. 1 – Fig. 2
Developed by: WG4
Subject: Ball pressure test K e y w o r d s :
- Lens with a reticule
- Diameter of the
indentation
- Steel ball
- Test specimen support
- Loading device
Decision approved at the
46th CTL Plenary Meeting, in
2009
Question:
Define the “best practice” test procedure for ball pressure test consistent with the requirements in
the standard.
Decision:
Clause 7.1 – Conduct the test in air, in a heating cabinet at the required temperature within a tolerance of
+/- 2°C.
Before introducing the test specimen, bring the test apparatus, the test specimen support and loading
device to the required temperature and maintain them at the required temperature for 24 h or until
equilibrium conditions are reached, whichever occurs sooner. Measure the temperature as close as
possible to the test specimen.
Place the test specimen in a forced air convection single cabinet according to sub clauses 4.1.5 and 4.1.6
of IEC 60216-4-1/1990. Support the specimen on a block, such as stainless steel block, with adequate
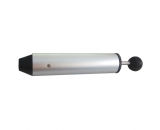
dimensions, so that its upper surface is horizontal. Apply the ball pressure apparatus so that the steel ball
is pressed against the surface with a force of 20 N +/- 0,2 N. Take care to ensure the ball does not move
during the test. After the ball pressure apparatus has been applied for 60 + 2/0 minutes, remove it and
immerse the test specimen in ambient temperature water within 10 s. Allow the test specimen to cool in
the water to approximately room temperature for no longer than 8 minutes and remove all traces of water.
Clause 7.2 – Within 3 minutes after removal from the water, measure the diameter of the indentation
caused by the ball to one decimal place. The spherical portion of the indentation to be measured excludes
any material deformation around the spherical indentation, as shown in figure 2. In case of doubt, make
two further tests and measure the diameter of the indentation to one decimal place; both of these tests shall
meet the requirements of clause 9. The result is expressed as pass if the diameter of the indentation(s)
does not exceed 2,0 mm. The diameter of the indentation caused by the ball is measured by a lens
(approximate magnification of 10x) equipped with a reticule, a cross-travel measuring table and a lighting
device to enable the illumination of the surface of the test specimen. For measuring the diameter of the
indentation, the reticule is moved from one side to the other.
In case of doubt, other instruments may be used, i.e. microscope or profile projector. In case of nonround
indentation obtained, indicate on the Report the longest measurement observed, maximum
allowable difference between the longest and shortest measurement: 0,2 mm.
页:
[1]
